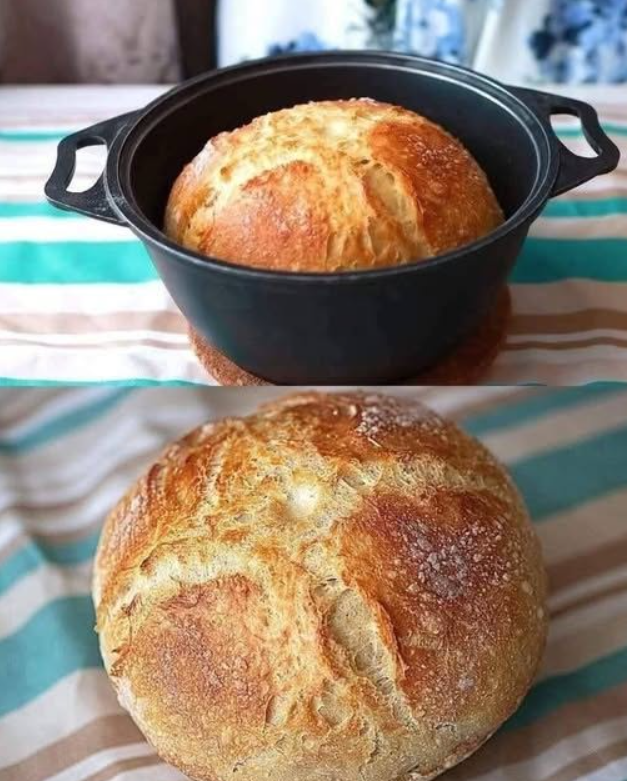

This Dutch Oven Artisan Bread has a beautifully crisp, golden crust with a soft, chewy interior and an incredible homemade flavor. The long fermentation develops the dough naturally, making this recipe simple enough for beginners and delicious enough for experienced bakers.
Prep Time: 15 minutes
Rise Time: 12–18 hours + 45 minutes
Bake Time: 45 minutes
Total Time: 13–19 hours
Servings: 10–12 slices
Ingredients
- 3 cups (375 g) bread flour (or all-purpose flour)
- 1½ teaspoons salt
- ½ teaspoon instant yeast
- 1½ cups (360 ml) warm water (about 105–110°F / 40–43°C)
- Extra flour for dusting
Equipment
- Large mixing bowl
- Wooden spoon or silicone spatula
- Plastic wrap or clean kitchen towel
- Parchment paper
- 5 to 6-quart Dutch oven with lid
- Sharp knife or bread lame
- Cooling rack
Step 1: Mix the Dough
- In a large bowl, whisk together the flour, salt, and instant yeast.
- Pour in the warm water.
- Stir with a wooden spoon until all of the flour is incorporated.
- The dough will look rough, sticky, and shaggy. This is exactly how it should be.
Do not knead the dough.
Step 2: Let the Dough Rise
- Cover the bowl tightly with plastic wrap or a clean towel.
- Leave it at room temperature for 12 to 18 hours.
The dough is ready when:
- It has doubled in size.
- The surface is covered with bubbles.
- It looks soft and airy.
Step 3: Shape the Dough
- Generously flour your work surface.
- Turn the dough out gently.
- Sprinkle a little flour on top.
- Fold each edge toward the center several times.
- Shape into a loose round ball without pressing out all the air.
Avoid overworking the dough.
Step 4: Second Rise
- Place the dough seam-side down on a sheet of parchment paper.
- Cover loosely with a towel.
- Let rise for 30–45 minutes.
Meanwhile, preheat the oven.
Step 5: Preheat the Dutch Oven
- Place the empty Dutch oven with its lid into the oven.
- Heat the oven to 450°F (230°C).
- Allow the Dutch oven to heat for at least 30 minutes.
A fully heated Dutch oven creates steam that produces the bakery-style crust.
Step 6: Score the Dough
- Carefully remove the hot Dutch oven.
- Lift the dough using the parchment paper and lower it into the pot.
- Using a sharp knife or bread lame, make one deep slash across the top or create a decorative pattern.
Scoring helps the bread expand evenly while baking.
Step 7: Bake
- Cover with the lid.
- Bake for 30 minutes.
- Remove the lid carefully.
- Continue baking for 12–15 minutes, or until the crust is deep golden brown.
The bread is done when:
- The crust is dark golden.
- It sounds hollow when tapped.
- The internal temperature reaches about 205–210°F (96–99°C).
Step 8: Cool
- Remove the bread from the Dutch oven.
- Place it on a wire rack.
- Let it cool for at least 1 hour before slicing.
Cooling allows the crumb to finish setting and prevents a gummy texture.
Tips for Success
- Bread flour creates a chewier loaf, while all-purpose flour gives a slightly softer crumb.
- Measure flour by weight for the most consistent results.
- If your kitchen is cool, allow the dough a little extra rising time.
- Dust the dough lightly with flour before scoring for a rustic bakery look.
- Store the bread in a paper bag or bread box for up to 3 days.
- Freeze sliced bread for up to 3 months and toast slices directly from frozen.
Serving Ideas
Enjoy this artisan bread with:
- Butter and flaky sea salt
- Olive oil and balsamic vinegar
- Homemade soups and stews
- Sandwiches
- Cheese boards
- Garlic herb butter
- Toast with jam or honey
This easy Dutch Oven Artisan Bread delivers a crisp, crackly crust, an airy interior, and rich homemade flavor with very little hands-on work—perfect for everyday baking or serving alongside your favorite meals.