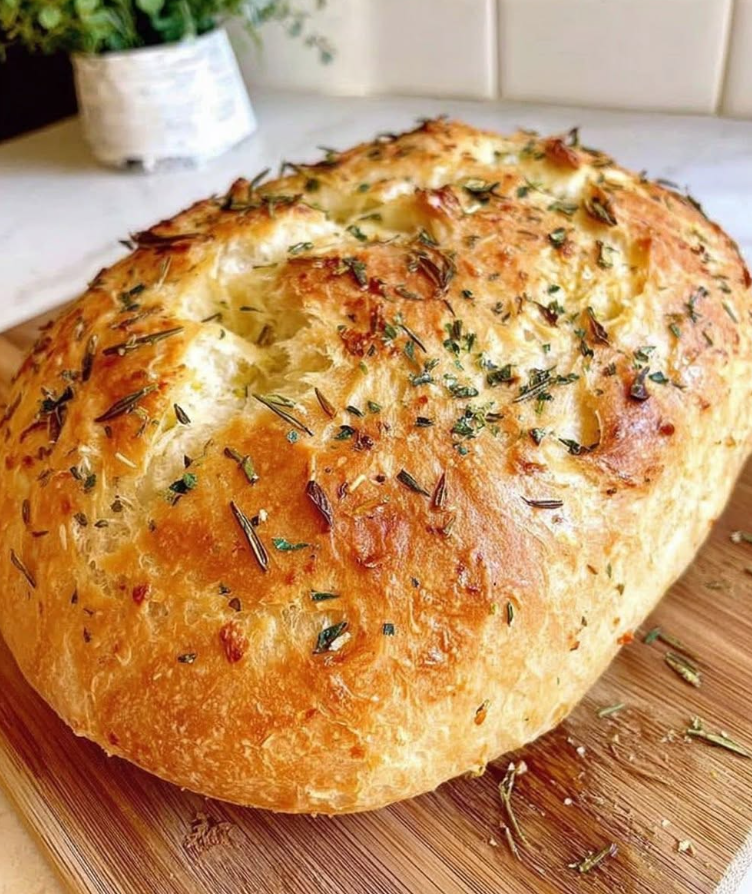
This rustic no-knead rosemary garlic bread has a crisp, golden crust with a soft, chewy interior packed with fragrant rosemary and roasted garlic flavor. With minimal hands-on work and a long rise, it’s an easy artisan-style loaf that’s perfect for soups, pasta, sandwiches, or simply served warm with butter.
Prep Time
- Prep: 15 minutes
- First Rise: 12–18 hours
- Second Rise: 45–60 minutes
- Bake: 40–45 minutes
- Total Time: About 14–20 hours
Yield: 1 large loaf (8–10 slices)
Ingredients
- 3 cups (390g) bread flour
- 1 teaspoon salt
- ½ teaspoon instant yeast
- 2 tablespoons fresh rosemary, finely chopped
- 5–6 garlic cloves, roasted and mashed
- 1¼ cups (300ml) warm water
- 1 tablespoon olive oil
- Extra flour for dusting
- Optional: Flaky sea salt for topping
Equipment
- Large mixing bowl
- Wooden spoon or spatula
- Plastic wrap or clean kitchen towel
- Dutch oven with lid
- Parchment paper
Step 1: Roast the Garlic
- Preheat your oven to 400°F (200°C).
- Slice the top off a whole garlic bulb.
- Drizzle with a little olive oil and wrap it in foil.
- Roast for 35–40 minutes until soft and golden.
- Let cool, then squeeze out the garlic cloves and mash them into a smooth paste.
Step 2: Mix the Dough
In a large bowl, combine:
- Bread flour
- Salt
- Instant yeast
- Chopped rosemary
Add:
- Warm water
- Olive oil
- Mashed roasted garlic
Mix everything together using a wooden spoon until no dry flour remains.
The dough will look sticky and shaggy—this is exactly how it should be.
Step 3: First Rise
Cover the bowl with plastic wrap or a towel.
Leave the dough at room temperature for 12–18 hours.
By morning, the dough should be bubbly, airy, and about doubled in size.
Step 4: Shape the Dough
Lightly flour your work surface.
Turn the dough out gently without punching out all the air.
Fold the edges toward the center a few times to form a loose round loaf.
Place the dough seam-side down on a piece of parchment paper.
Dust lightly with flour.
Cover loosely and let rise for 45–60 minutes.
Step 5: Preheat the Dutch Oven
About 30 minutes before baking:
- Place your Dutch oven with its lid inside the oven.
- Preheat to 450°F (230°C).
The pot needs to be very hot to create a bakery-style crust.
Step 6: Bake the Bread
Carefully remove the hot Dutch oven.
Using the parchment paper, lift the dough and lower it into the pot.
Cover with the lid.
Bake:
- 30 minutes covered
- Remove the lid.
- Bake another 10–15 minutes until the crust is deep golden brown.
The loaf should sound hollow when tapped on the bottom.
Step 7: Cool
Transfer the bread to a wire rack.
Allow it to cool for at least 45 minutes before slicing.
This resting time helps the crumb finish setting and prevents a gummy texture.
Serving Ideas
Enjoy this bread with:
- Salted butter
- Olive oil and balsamic vinegar
- Tomato soup
- Pasta dishes
- Cheese boards
- Grilled vegetables
- Toasted breakfast slices
Storage
- Store in a paper bag or bread box for up to 3 days.
- Freeze sliced bread in a freezer-safe bag for up to 3 months.
- Reheat slices in a toaster or warm the whole loaf in a 350°F (175°C) oven for about 10 minutes.
Tips for Success
- Use fresh rosemary for the best flavor.
- Roasted garlic gives a sweet, mellow taste without overpowering the bread.
- Avoid adding extra flour to the dough—it should remain sticky.
- A preheated Dutch oven is the key to achieving a crisp, artisan-style crust.
- Let the bread cool completely before slicing for the best texture.